Nginx reverse proxy guide — this feature is one of the most powerful ways to secure, optimize, and scale modern web applications. By placing Nginx in front of your backend servers, you create a fast, secure gateway that controls traffic, reduces load, and protects your infrastructure.
A reverse proxy is one of the most important and high-impact features of Nginx — and it’s the main reason Nginx powers large-scale platforms like Netflix, GitHub, Dropbox, and Cloudflare.
It acts as a secure gateway between the client and your backend servers, ensuring performance, security, and full traffic control.
⭐ What Is a Reverse Proxy? (Simple Explanation)
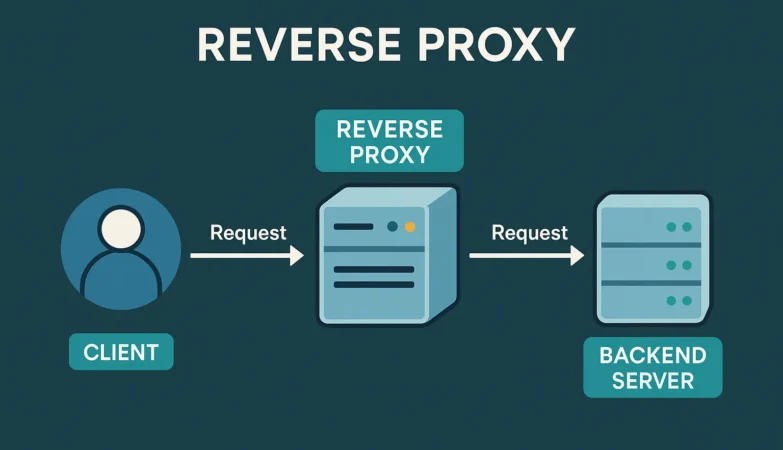
A reverse proxy sits in front of your application servers and handles all incoming requests before they reach your backend.
Client → Nginx Reverse Proxy → Backend Server
Nginx receives the traffic, processes it, secures it, optimizes it, and then forwards it to your internal application — making your infrastructure faster, safer, and more scalable.
🚀 Why Nginx Reverse Proxy Is So Powerful
✔ 1. Hides Your Backend
The real server location is never exposed to attackers.
✔ 2. Handles SSL/TLS
Nginx manages HTTPS termination, reducing CPU load on backend systems.
✔ 3. Filters Malicious Traffic
Combined with rate limiting & ModSecurity, Nginx becomes a front-line security shield.
✔ 4. Boosts Performance
It can:
- Cache responses
- Compress content
- Serve static files instantly
- Reduce load on backend apps
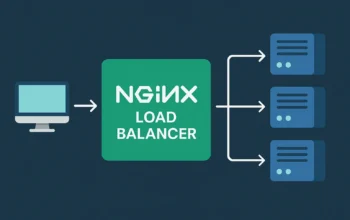
✔ 5. Enables Load Balancing & Scaling
You can have multiple app servers behind one proxy.
🔍 How Nginx Processes Reverse Proxy Requests
When a request arrives:
1️⃣ Client sends request
2️⃣ Nginx evaluates server + location blocks
3️⃣ Nginx forwards request using proxy_pass
4️⃣ Backend responds
5️⃣ Nginx modifies, secures, or caches the response
6️⃣ Sends the final optimized output to the client
This makes Nginx a smart traffic controller, not just a forwarding tool.
🧩 Reverse Proxy Configuration Example (Production-Ready)
server {
    listen 80;
    server_name hackervault.tech;

    location / {
        proxy_pass http://127.0.0.1:8080;

        proxy_set_header Host $host;
        proxy_set_header X-Real-IP $remote_addr;
        proxy_set_header X-Forwarded-For $proxy_add_x_forwarded_for;
        proxy_set_header X-Forwarded-Proto $scheme;
    }
}
🧩 $host — The Hostname Requested by the Client
What it represents:
The exact domain or subdomain the user typed into the browser.
Example:
hackervault.techapi.hackervault.tech
Why it matters:
Your backend needs to know which hostname was requested, especially if multiple apps run on the same server.
How Nginx uses it:
proxy_set_header Host $host;
This ensures correct routing, accurate redirects, and proper domain handling.
🧩 $remote_addr — The Real IP Address of the User
What it contains:
The original IP address of the client making the request.
Example:
192.168.1.55102.33.244.12
Why it matters:
If you don’t forward $remote_addr, your backend will think every request comes from Nginx itself (like 127.0.0.1).
This breaks:
- Login rate limiting
- Security logging
- Geo-location
- IP-based blocking rules
How Nginx uses it:
proxy_set_header X-Real-IP $remote_addr;
🧩 $proxy_add_x_forwarded_for — Full Chain of Client IPs
What it contains:
A comma-separated list of IP addresses showing the complete path of the request.
Example:
45.62.20.15, 127.0.0.1
Why it matters:
This is used for:
- Identifying real user IP behind proxies
- Detecting spoofed/abusive traffic
- Logging for analytics & security tools
How Nginx uses it:
proxy_set_header X-Forwarded-For $proxy_add_x_forwarded_for;
This ensures your backend has the full request history.
🧩 $scheme — Whether the Client Used HTTP or HTTPS
What it represents:
The protocol used by the incoming request:
httphttps
Why it matters:
Your backend may need this to:
- Generate correct URLs
- Handle redirects properly
- Avoid HTTPS → HTTP downgrade loops
- Maintain consistent security policies
How Nginx uses it:
proxy_set_header X-Forwarded-Proto $scheme;
🔐 What this config ensures:
- Correct client IP is forwarded
- Backend receives real protocol info
- Prevents broken HTTPS redirects
- Ensures compatibility with APIs and frameworks
🛡️ Security Advantages of Reverse Proxy Setup
- Hides backend IP addresses
- Blocks scanners, bots, & direct attacks
- Supports WAF & OWASP CRS
- Enables DDoS protection & throttling
- Prevents direct exploitation of backend services
A reverse proxy drastically reduces your attack surface.
⚡ Performance Advantages
- Static files served instantly
- Backend CPU load drops
- Faster TTFB & lower latency
- Supports micro-caching for APIs
- Perfect for high-traffic applications
Nginx’s event-driven architecture makes reverse proxying extremely efficient.
🎯 In One Line:
Nginx as a reverse proxy gives you security, speed, scalability, and complete control over all incoming traffic — making it the backbone of modern web infrastructure.


That’s a solid point about game design encouraging replayability! I’ve been seeing ads for scatter link app download apk and their focus on responsible gaming is a welcome change. Hopefully, more platforms prioritize player wellbeing! 🤔